Install the Application in the Cloud
By installing Classroom Spy Professional to the Cloud you can monitor your computers over different networks and Internet.
The application consists of two modules that must be installed:
- Classroom Spy Professional Console (see Install Console )
- Classroom Spy Agent

Installing the Classroom Spy Agent
The "Classroom Spy Agent" must be installed on all remote computers that you want to monitor. To do this, you must have administrative privileges.
Agent can be manually or remotely installed.
Manual Agent Installation (Preferred)
To manually install an agent please go to remote computer and run the installation program.
In the first installation window click on second option Install "Classroom Spy Agent" .
On the end of installation you will have to configure an agent. To do so please read the chapter Agent Configuration .
Agent can be installed in stealth mode (select " Stealth Agent Install " check-box).
In such way no program group is created, application does not appear in Add/Remove programs and no icon is displayed.
Agent Configuration
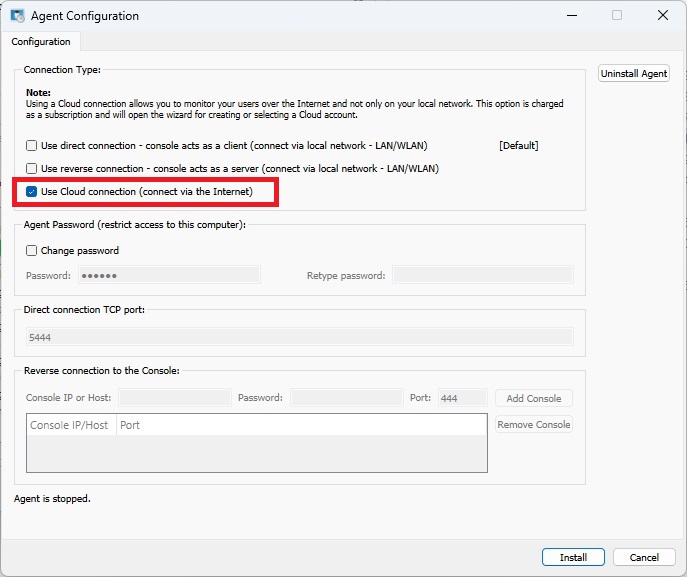
During installation, you need to type the password that protects the configuration and access to the agent.
Here, simply select one password and remember it. Note that the default port on which the agent operates is 5444. You can change this port during installation or, later on (Advanced Configuration tab).
If you use a firewall, you must open the used port.
You can choose to make this computer accessible only via Cloud connection by selecting " Use Cloud connection ", which allows you to monitor computer over the Internet. Cloud license is subscription based.
Create Cloud Account (needed only for a first time)
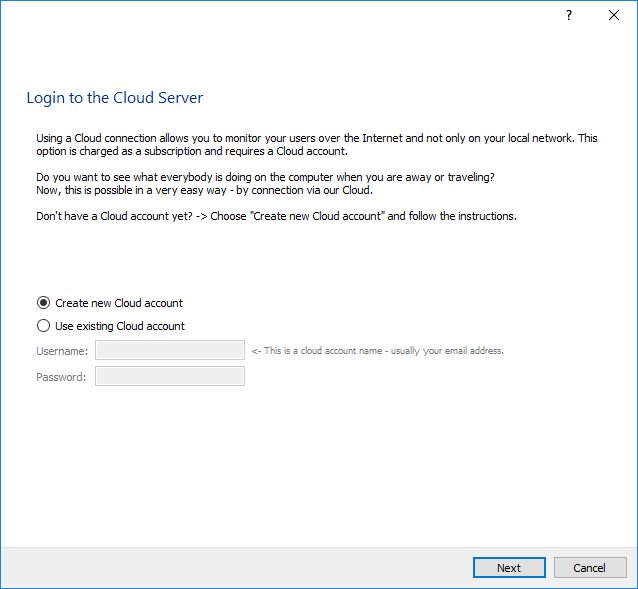
If you selected that you want to use Cloud connection then you will be asked to use existing Cloud account or to create a new Cloud account.
If you are creating a Cloud account for a first time, your trial Cloud license will be automatically enabled.
NOTE: Cloud account can also be created directly from the monitoring console using menu " Cloud / Create Cloud account ".
To monitor your computer over the Internet, you need to have the Cloud account.
If you don't have the Cloud account yet then you can create it here by selecting " Create new Cloud account ":
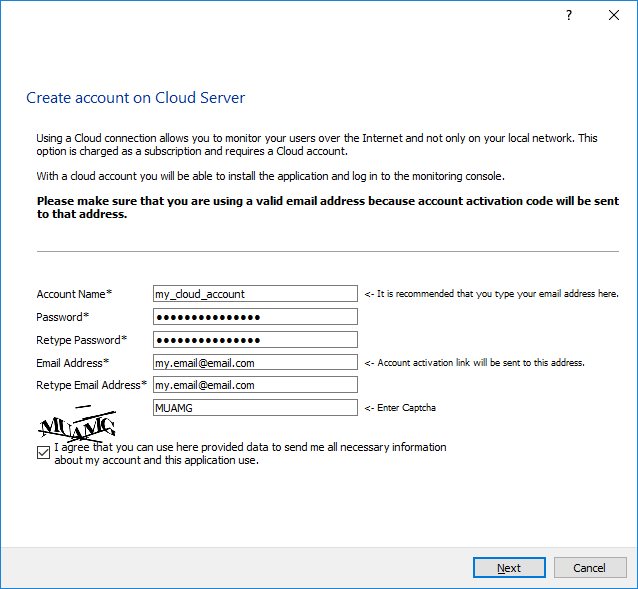
You will receive an email with account activation code after confirming this step:
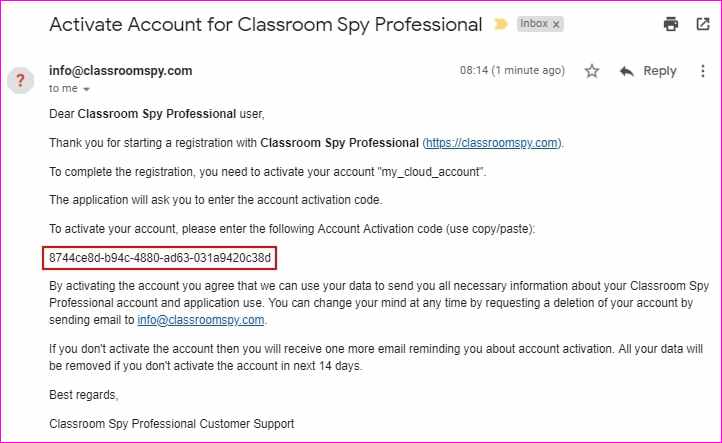
NOTE: If you didn't receive an email, please check your SPAM folder or contact support.
Proceed with installation and enter account activation code from email:
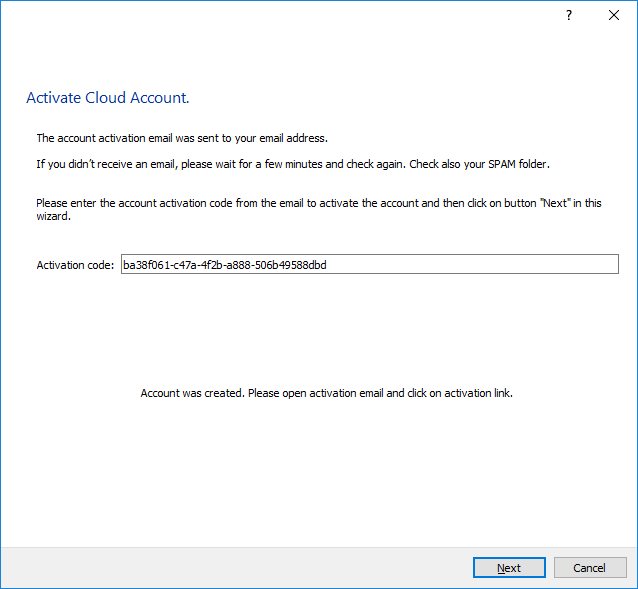
Use Existing Cloud Account (if you already created the Cloud account)
If you already created a Cloud account before then previous steps are not needed and you can choose " Use existing cloud account " and enter your Cloud account username & password:
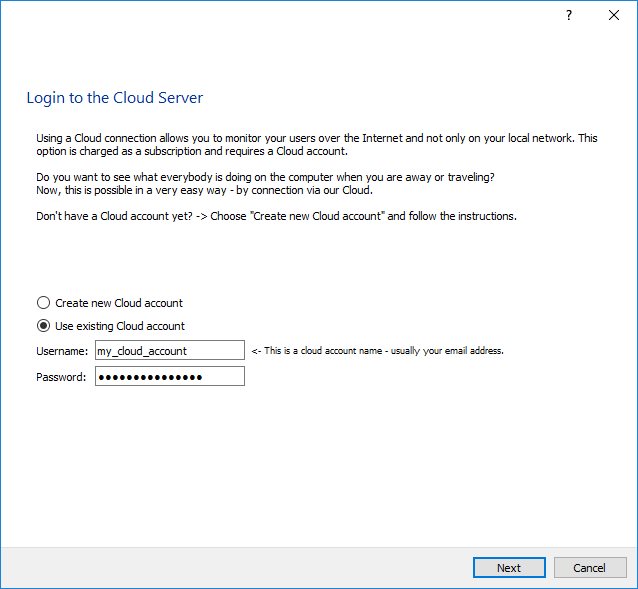
Click "Next" and confirm that you want to monitor this computer:
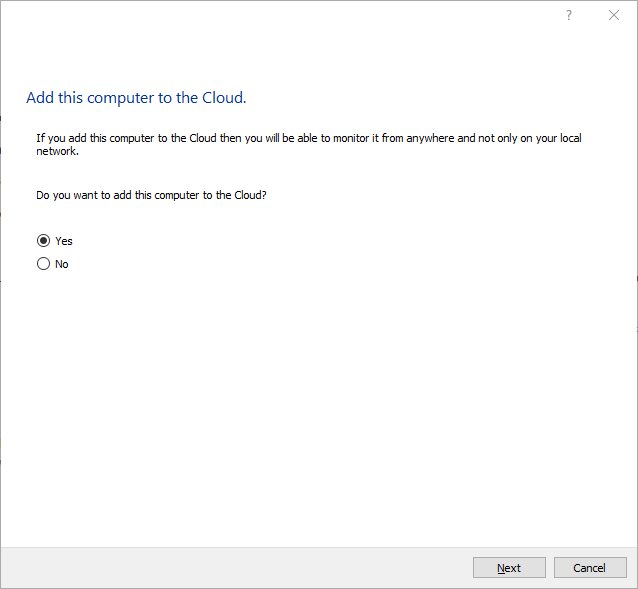
After that your remote computer was added to the cloud and it can be added to the console using menu " Cloud / Add computers from Cloud ".
Remote Agent Deployment over Active Directory using MSI Package
Remote agent installation is possible by deploying MSI package over Active Directory.
MSI package for agent that can be used for remote deployment over Active Directory can be downloaded here:
https://dwn.classroomspy.com/classroomspypro_agent.msi
It can be installed like this:
msiexec /i classroomspypro_agent.msi PASSWORD=my-agent-password CLOUD_ADD=Y CLOUD_ACCOUNT=my-cloud-account CLOUD_PASSWORD=my-cloud-password /qn
You need to deploy as usual using package classroomspypro_agent.msi and specifying those MSI properties:
- PASSWORD =my-agent-password
- CLOUD_ADD =Y
- CLOUD_ACCOUNT =my-cloud-account
- CLOUD_PASSWORD =my-cloud-password
If you want to make the agent unrecognizable, you can choose new names for processes and for service by specifying those additional properties:
SERVICE_NAME ="Classroom Spy Agent"
SERVICE_PROCESS_NAME ="csp_ctrlagentsvc.exe"
PROCESS_NAME ="csp_ctrlagent.exe"